In today’s world, Python is used for many purposes in large projects, especially in AI, LLM, and RAG. However, maintaining a healthy environment, managing compatibility, and handling packaging can be challenging tasks.
For this reason, using containers not only for deploying Python apps but also as a development environment could be a suitable approach.
In this post, we will show how simple it is to start developing Python projects without needing to install Python, manage multiple versions, create virtual environments, set environment variables, and handle other prerequisites.
We can achieve this directly from VSCode using just one extension.
Presenting the Extension#
We’ve probably all seen the .devcontainer folder and the devcontainer.json file in other projects. But what do they do?
The .devcontainer folder and its JSON file are used to define a containerized development environment. This setup ensures that all developers on a project have a consistent development environment, regardless of their local machine configurations. The .devcontainer configuration can specify the base image, extensions, and settings needed for the project.
We’re going to make this easy by generating the configuration files automatically—no need to craft them manually from scratch! 😉
So let’s get started…
Prerequisites#
Before we dive in, make sure we have Docker and VSCode installed.
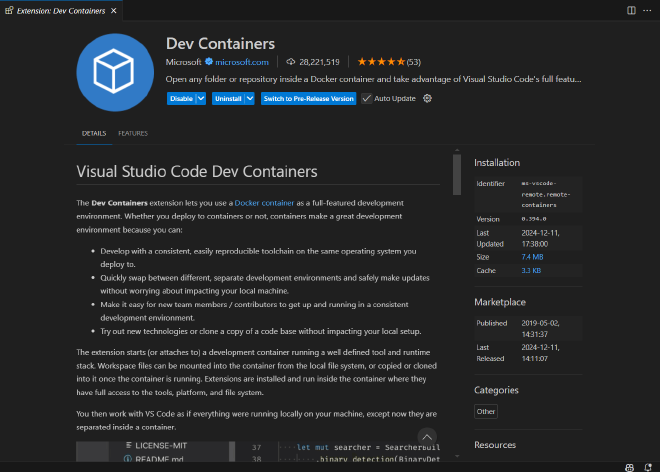
Step 1: Installing the Extension#
First, let’s install the necessary extension in VSCode. We can do this by visiting the Dev Container extension page or by searching for it directly in the extension manager in Visual Studio Code. Use the Ctrl+Shift+X shortcut to open the extension manager.
Step 2: Generate the DevContainer Folder#
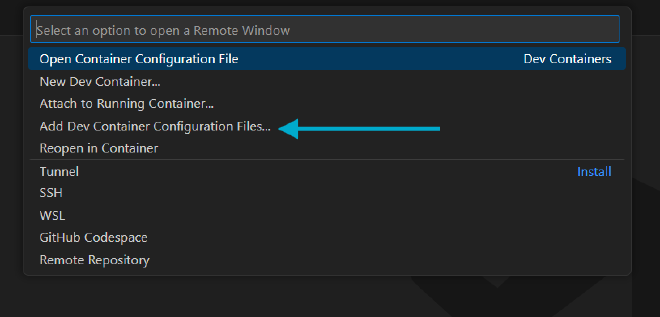
After installing the extension, we should find an icon at the bottom left side of our IDE. Click on it and follow the wizard steps to generate the .devcontainer folder and configuration files.

Select Add Dev Container Configuration Files.
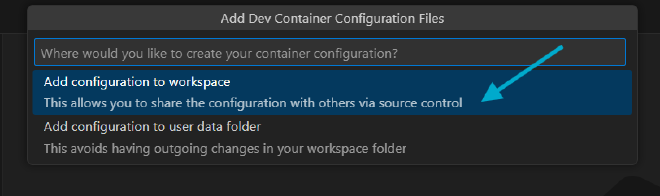
Then select Add Configuration to Workspace. This will add the .devcontainer folder and related configuration to our current project directory.
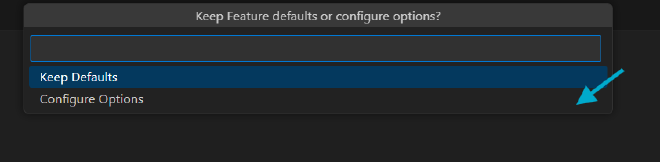
We can choose from a variety of preset configurations. In our case, we will select Python 3.

We’ll be prompted to choose the Python version for your container. Pick any version you’re comfortable with (we’ll go with Python 3.12 bullseye).

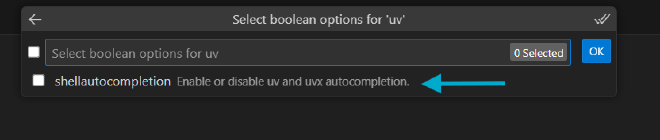
In the following step, we can choose additional features. We’ll select uv, a great package and project manager that we’ll use further in this post.

We can also select additional configurations for the features, so let’s enable the shell autocompletion option.
Dependabot functionality. Dependabot helps us keep our dependencies up to date by automatically checking for updates and creating pull requests.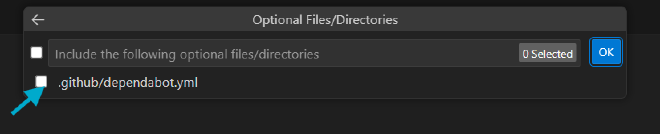
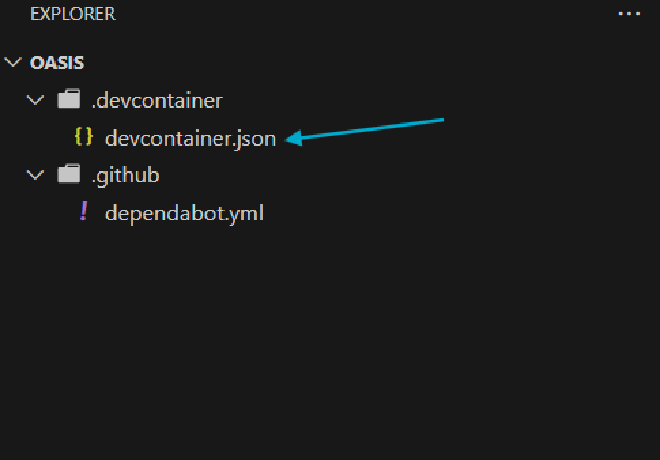
After running the wizard, we’ll end up with the following root project structure.
🎉 Once the .devcontainer folder is set up, there’s no need to build an image manually—the extension will handle that for us! We’re now ready to connect to the containerized environment and start using it as our development environment. We’ll explore this process in Part 2 of this post, so stay tuned!
Happy coding, and see you in the next part!