
In our series exploring how to set up a streamlined and organized way to start your Python development journey using the DevContainer VSCode extension and Docker (or WSL/Podman), we’ve already seen how simple it is to define our development environment using just the DevContainer extension. Now, we’re ready to move on to the next part of the series: Optimize Python Development with VSCode and Docker.
Running Our Environment for the First Time#
In this post, we will run our development environment for the first time and start working with Python using an amazing package and project manager, uv.
After generating the definition for our environment, we now have a devcontainer.json file structure. Let’s dig in to explore what we have in this setup:
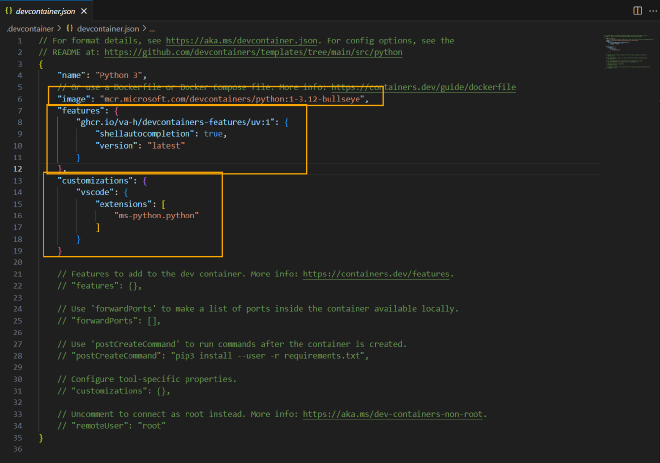
Breaking Down the devcontainer.json Structure#
Image Section:
This section specifies the container image reference, which is hosted on the Microsoft Container Registry.
Note: You can also use a local image if you prefer. use DockerFile or Docker compose file.Features Section:
Think of this section as a way to enhance the environment with additional tools and packages. In our case, we’re usinguv(with shellautocompletion option enbaled).customization Section: The
customizationsection is used to fine-tune the container development environment. It allows us to install additional extensions that will only be loaded inside the container, apply specific settings related to VSCode preferences, and execute additional commands.
#
If you’re working with a rootless container, you can find relevant information. here.
Launching Our Environment for the First Time 🚀#
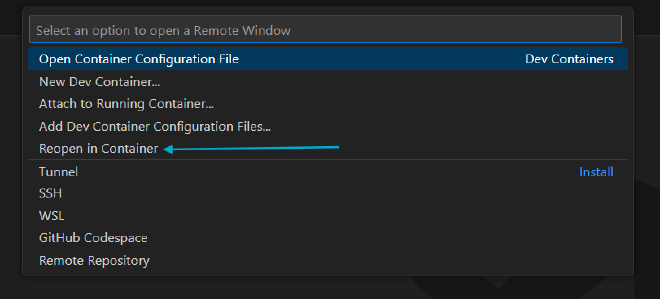
Now it’s time to launch our environment for the first time! To do this, simply click on the Dev Container icon and choose Reopen in Container.
In the background:
- An image will be added to your Docker images list.

- A container should be running.

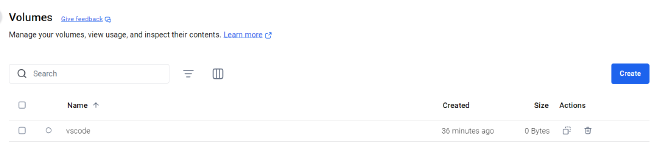
- A volume will be created.
- VSCode will reload, but this time, it will run under the container.

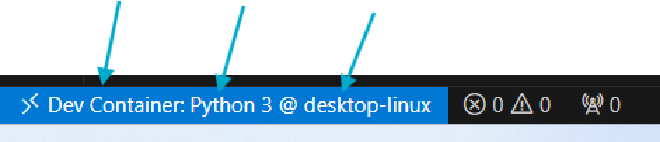
Time to Verify#
The Remote Indicator in the status bar will display additional information, such as the name of the container we’re currently in and the distribution of the image being used.
Verifying Python Version and Testing uv#
Let’s perform a couple more checks by verifying the Python version being used and testing if uv is running correctly.

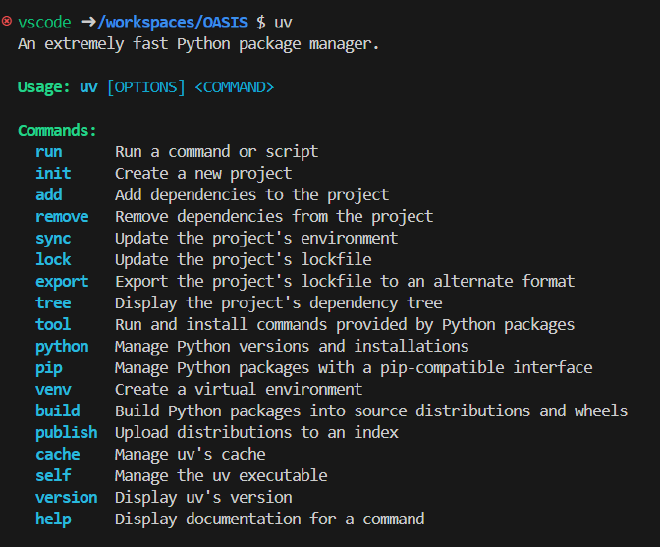
Everything seems good so far! The next step is to create our first project and run it. That’s exactly what we’ll cover in the next post.
Stay tuned!